
Blind XSS
Blind XSS (Cross-Site Scripting) is a type of XSS attack where the attacker is able to inject malicious code into a vulnerable web application, but is unable to see the results of their attack directly. In other words, the attacker does not receive any feedback or response from the application and is blind to the results of their attack.
Blind XSS attacks often occur when a web application sanitizes or filters user input, preventing the attacker from seeing the effects of their code injection. However, the injected code may still be executed by other application users, potentially resulting in the theft of sensitive information or the compromise of user accounts.
Blind XSS attacks can be more challenging to detect and mitigate than traditional XSS attacks since the attacker does not receive immediate feedback about the success or failure of their exploit. However, there are various techniques and tools available to detect and prevent Blind XSS attacks, one of which is XSS Hunter.
What is XSS Hunter?
XSS Hunter is a robust web application penetration testing tool designed to identify and prevent cross-site scripting (XSS) vulnerabilities in web applications. By providing a unique tracking code to the tester, XSS Hunter allows them to insert it into the input fields of the target application. When a real user interacts with the application and the input with the tracking code is executed, XSS Hunter captures the payload and sends it back to the tester. This empowers the tester to detect any potential vulnerabilities in the application and demonstrate the impact of a successful XSS attack.
XSS Hunter is versatile and can test web applications in various environments, including static websites, dynamic web applications, and web applications with complex authentication mechanisms. It helps developers and security professionals identify and fix XSS vulnerabilities in their applications, contributing to making the web a safer place for everyone.
However, the online platform hosting XSS Hunter, xsshunter.com, was shut down due to security concerns. Reports suggest that the tool was vulnerable to attacks that could allow attackers to access sensitive user information, such as tracking codes and session tokens. This could compromise the security of the application being tested and the testers using the tool. Consequently, the creators of XSS Hunter recommended that users host their own instance of the tool on their servers, ensuring that it is only accessible to them.
To ensure maximum security, it's crucial to use reputable and secure tools to conduct security testing and update them regularly. Additionally, it's essential to be mindful of potential risks and vulnerabilities associated with any tool or technique used in security testing and take appropriate precautions to safeguard yourself and your data.
Setting Up XSS Hunter on Digital ocean
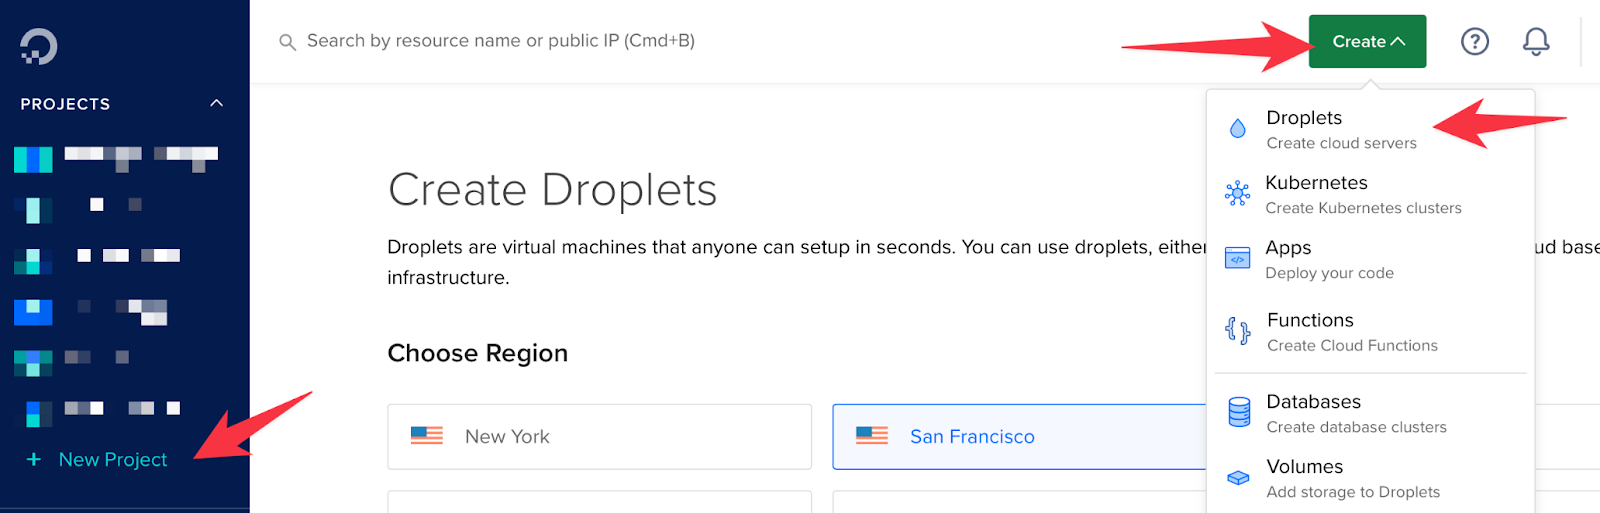
Let’s create a droplet on Digitalocean.
- To begin, create an account on Digital Ocean. Once you have signed in, create a new project by clicking on the appropriate button. Navigate to the newly created project and select the "Create" option to create a droplet.
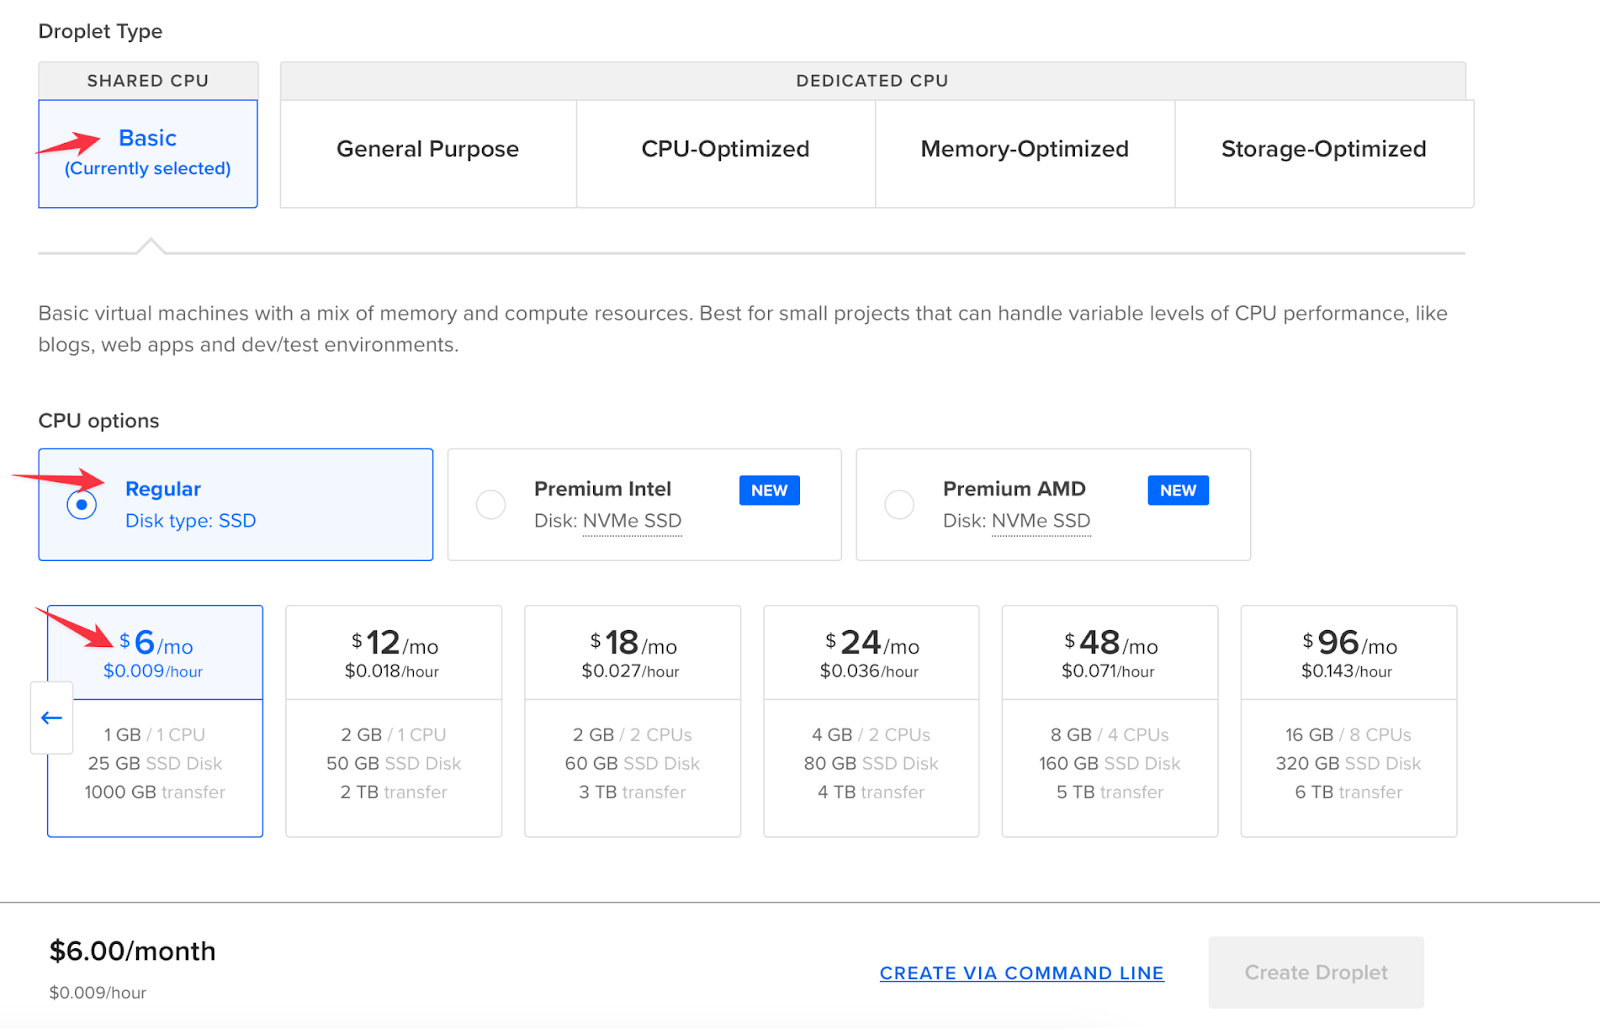
- When creating a droplet, you can customize it by selecting the features that suit your needs. In my case, I have opted for the basic features, which should require a minimum amount to run. Specifically, I have selected the Ubuntu OS 20.04 (LTS), Dedicated CPU (Basic), and regular SSD options. Finally, I have chosen the 6$ per month pricing plan.
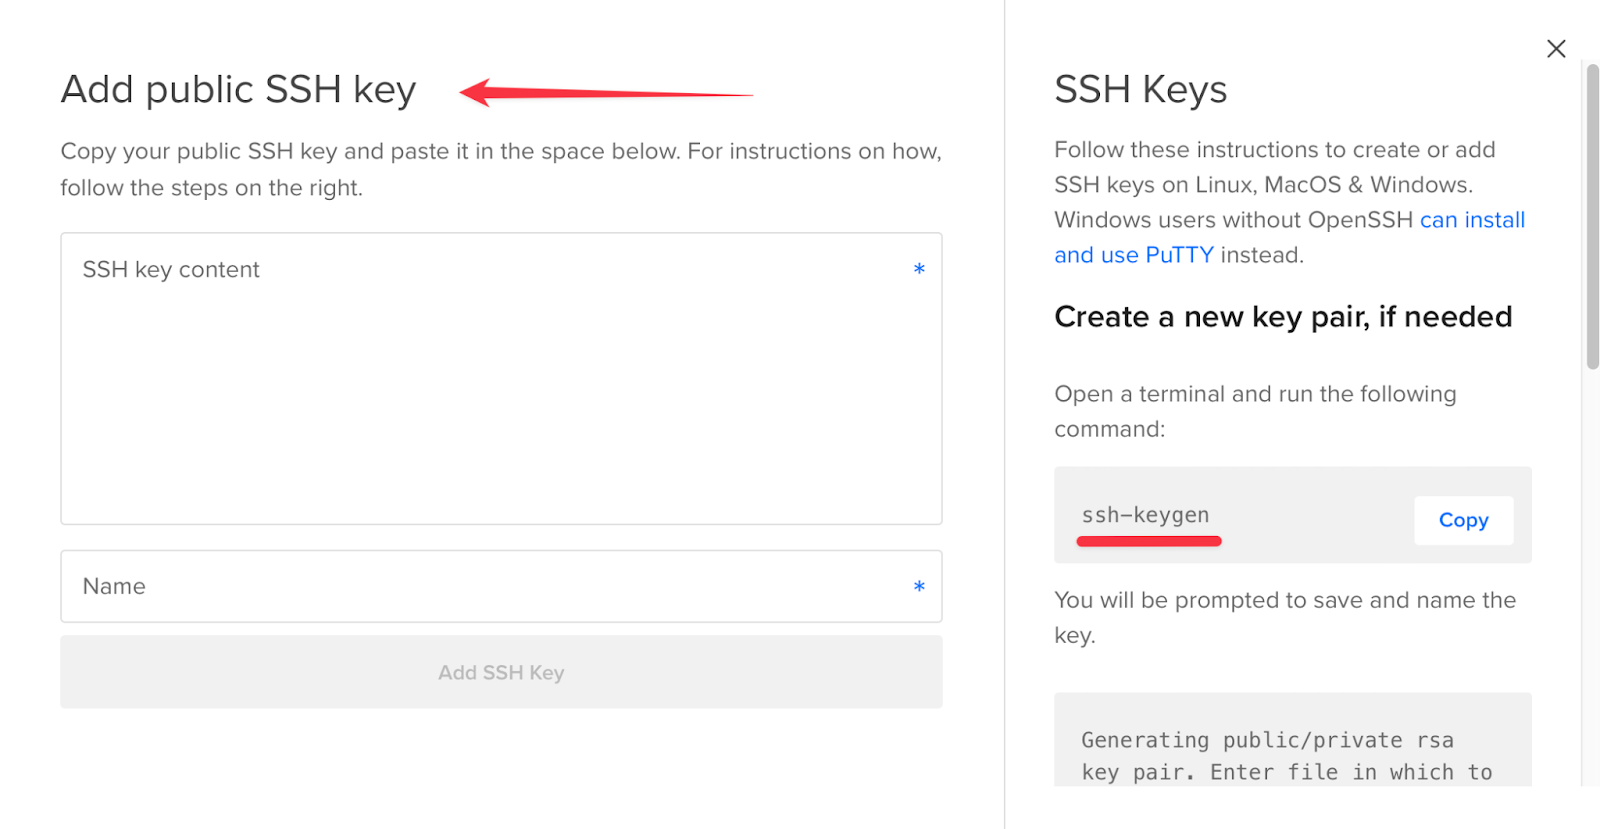
- To add your SSH key (public key) to the droplet, click on the "New SSH Key" option. This will enable you to log in securely. Don't forget to give your droplet a name before clicking "Create". Once completed, your droplet will be created.
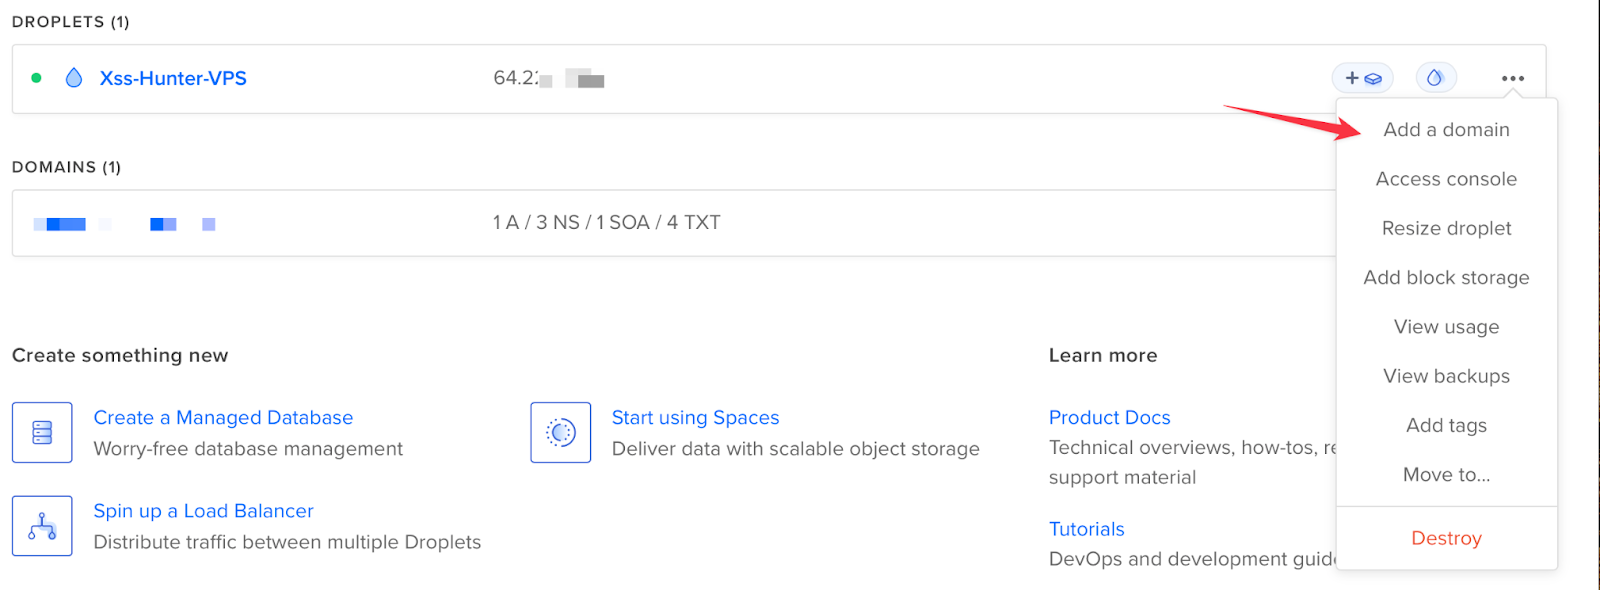
- After your droplet is created, you will see it running on the DigitalOcean dashboard, and you will be provided with the IP address of the server you created. You can use this IP address to access the server machine via the SSH command.

- Also you can add domain to your VPS server which you can do by clicking on add domain option
- To access the VPS machine, there are two options: you can either use an app like Termius, or you can SSH through your terminal with the command $ ssh -i privatekey root@IPaddress.
- If you choose to use Termius, you can add a new host by entering the IP address, port number 22, root as username, and your private key as the password. Then, click on "Connect" to access the VPS machine.
- After accessing the VPS server's terminal, you can improve its security by creating a new user with sudo privileges and disabling the root login. To do this, you can follow the instructions provided in the following links:
By creating a new user with sudo privileges, you can perform administrative tasks without logging in as root, which helps to prevent unauthorized access to your VPS. Disabling root login further enhances security by preventing brute-force attacks on the root account. It's important to take these steps to secure your VPS to protect your data and applications from potential threats.
- To ensure secure access to your VPS, it's important to add your public keys inside your new user home folder before disabling root login. You can accomplish this by following these steps:
- Create a .ssh folder inside the user's home directory: $ mkdir -p /home/newuser/.ssh
- Inside the .ssh folder, create a file named authorized_keys: $ touch /home/newuser/.ssh/authorized_keys
- Add your public key to the authorized_keys file: $ nano /home/newuser/.ssh/authorized_keys
- Copy and paste your public key into this file and save it.
By doing this, you'll be able to access the server with your new user's credentials and your public key will be used for authentication. Once you've verified that you can access the server with your new user account, you can disable root login to further enhance the security of your VPS.
Installing XSS Hunter
- To set up XSS Hunter, follow the steps outlined in the GitHub repository: https://github.com/mandatoryprogrammer/xsshunter-express. Make sure to carefully review and install all of the prerequisites listed in the repository to ensure a successful setup.
- After installing the prerequisites, you can set up XSS Hunter by following the steps outlined in the GitHub repository at https://github.com/mandatoryprogrammer/xsshunter-express. One of the steps involves configuring the docker-compose.yaml file by changing the Hostname to the domain name you assigned to your VPS and entering the SSL_contact_email with the email you want to use for automatically setting up and renewing TLS/SSL certificates.
If you want to receive email notifications when your payloads trigger on any target application, you can follow the additional steps mentioned in the GitHub repository.
- After completing the previous steps, you can now build and start your XSS hunter using the following commands:
- Navigate to the xsshunter-express directory using the command "cd xsshunter-express/".
- Start the PostgreSQL database container by running the command "docker-compose up -d postgresdb".
- Start the XSS hunter container by running the command "docker-compose up xsshunterexpress"
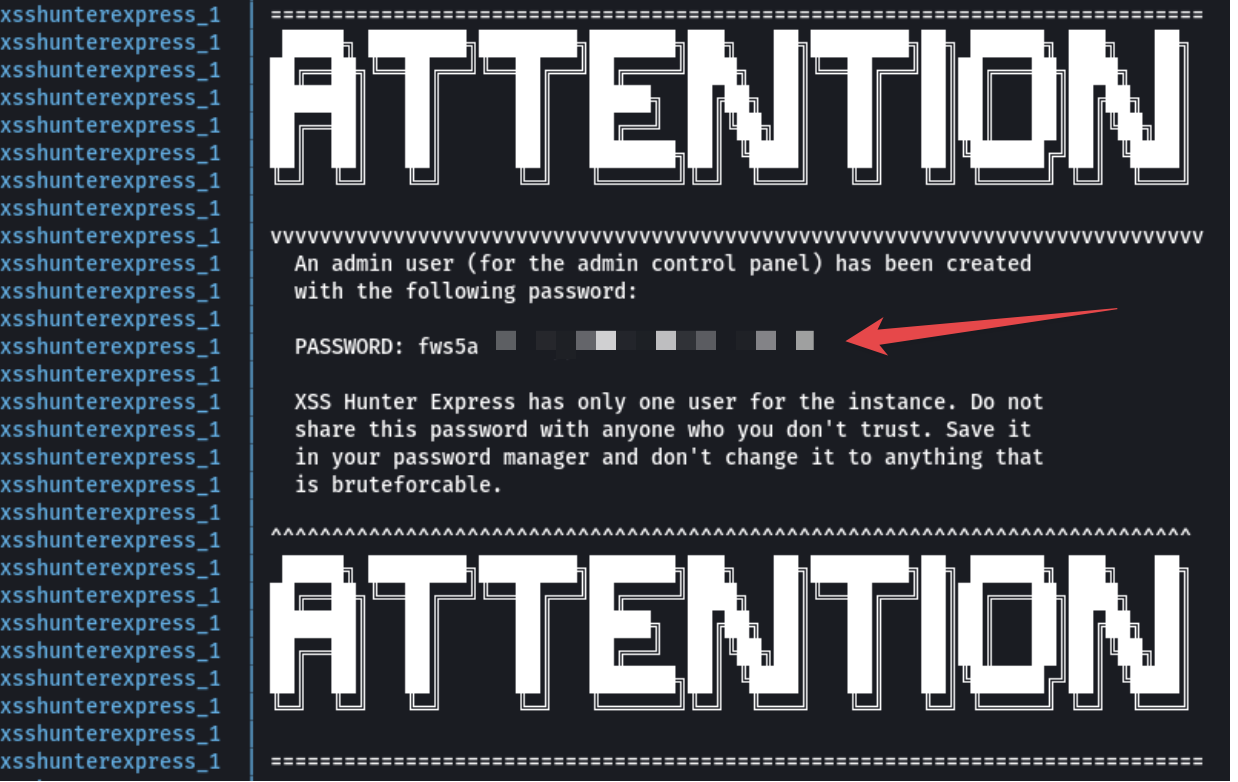
Upon completion, an attention message will appear, as shown in the image below. Note down the generated password (remember to save it in your password manager). These commands will build and start the XSS hunter application on your VPS. Access the application through your browser by navigating to the domain name you assigned to your VPS.
- JOB DONE!!!! You can Login to your personal XSS Hunter you just set up by going to the following URL: https://domain_name/admin

NOTE: The very first HTTP request to your instance will be slow due to the fact that the service will automatically generate a TLS/SSL certificate. This should only take ~15 seconds.
So this is how you can set up your own XSS Hunter on your VPS.
Good luck finding blind XSS.


